Chapter 2. Processing your first image
In this section we’ll start with the “hello world” app
and show you how you can load an image, perform some basic
processing on the image, draw some stuff on your image and then
display your results.
Loading images into Java is usually a horrible experience. Using
Java ImageIO, one can use the
read() method to create a
BufferedImage object. Unfortunately the
BufferedImage object hides the fact that it is
(and in fact all digital raster images are) simply arrays of pixel
values. A defining philosophy of OpenIMAJ is to keep
things simple which in turn means in OpenIMAJ images are
as close as one can get to being just arrays
of pixel values.
To read and write images in OpenIMAJ we use the
ImageUtilities class. In the
App.java class file remove the sample code within
the main method and add the following line:
MBFImage image = ImageUtilities.readMBF(new File("file.jpg"));
![[Note]](images/note.png) |
Note |
|
Throughout the OpenIMAJ tutorial you will be using a number of different classes. For brevity and to ensure focus
on the important parts of the code we haven't explicitly listed the imports you'll need to make at the top of you class files.
Most modern IDEs will suggest the import to use once you've entered the name of a class. If there are multiple potential class
name matches, you almost certainly want the one from an org.openimaj sub-package.
|
![[Tip]](images/tip.png) |
Tip |
|
The code for the tutorials (minus the exercise solutions) can be found as part of the OpenIMAJ source: https://github.com/openimaj/openimaj/tree/master/documentation/tutorial/tutorial-code/src/main/java/org/openimaj/docs/tutorial
|
For this tutorial, read the image from the following URL:
MBFImage image = ImageUtilities.readMBF(new URL("http://static.openimaj.org/media/tutorial/sinaface.jpg"));
The ImageUtilities class provides the ability to
read MBFImages and FImages. An
FImage is a greyscale image which represents each
pixel as a value between 0 and
1. An MBFImage is a multi-band
version of the FImage; under the hood it actually
contains a number FImage objects held in a list
each representing a band of the image. What these bands represent is
given by the image’s public colourSpace field,
which we can print as follows:
System.out.println(image.colourSpace);
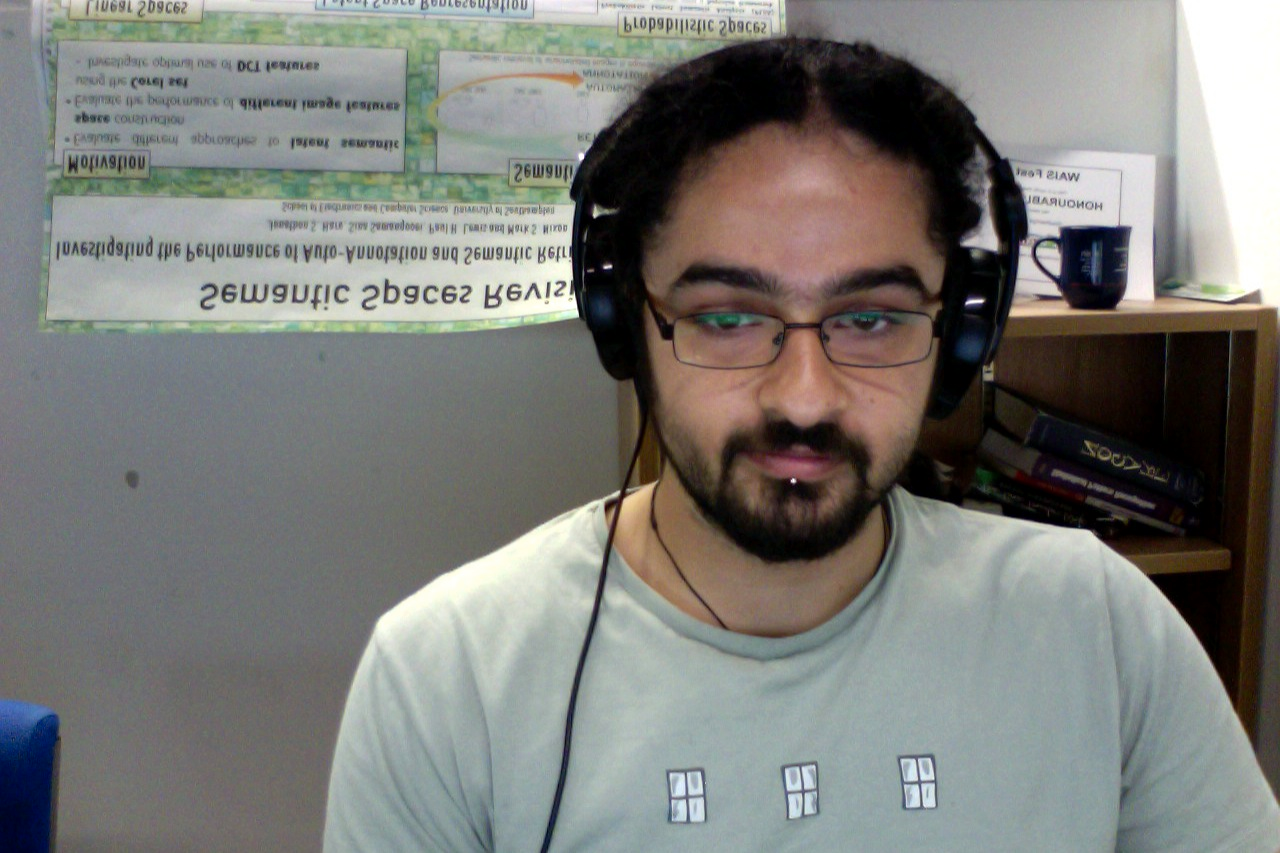
If we run the code, we’ll see that the image is an RGB image with
three FImages representing the red, blue and
green components of the image in that order.
You can display any OpenIMAJ image object using the
DisplayUtilities class. In this example we
display the image we have loaded then we display the red channel of
the image alone:
DisplayUtilities.display(image);
DisplayUtilities.display(image.getBand(0), "Red Channel");
In an image-processing library, images are no good unless you can do
something to them. The most basic thing you can do to an image is
fiddle with its pixels. In OpenIMAJ, as an image is just an array of
floats, we make this is quite easy. Let’s go through our colour
image and set all its blue and green pixels to black:
MBFImage clone = image.clone();
for (int y=0; y<image.getHeight(); y++) {
    for(int x=0; x<image.getWidth(); x++) {
        clone.getBand(1).pixels[y][x] = 0;
        clone.getBand(2).pixels[y][x] = 0;
    }
}
DisplayUtilities.display(clone);
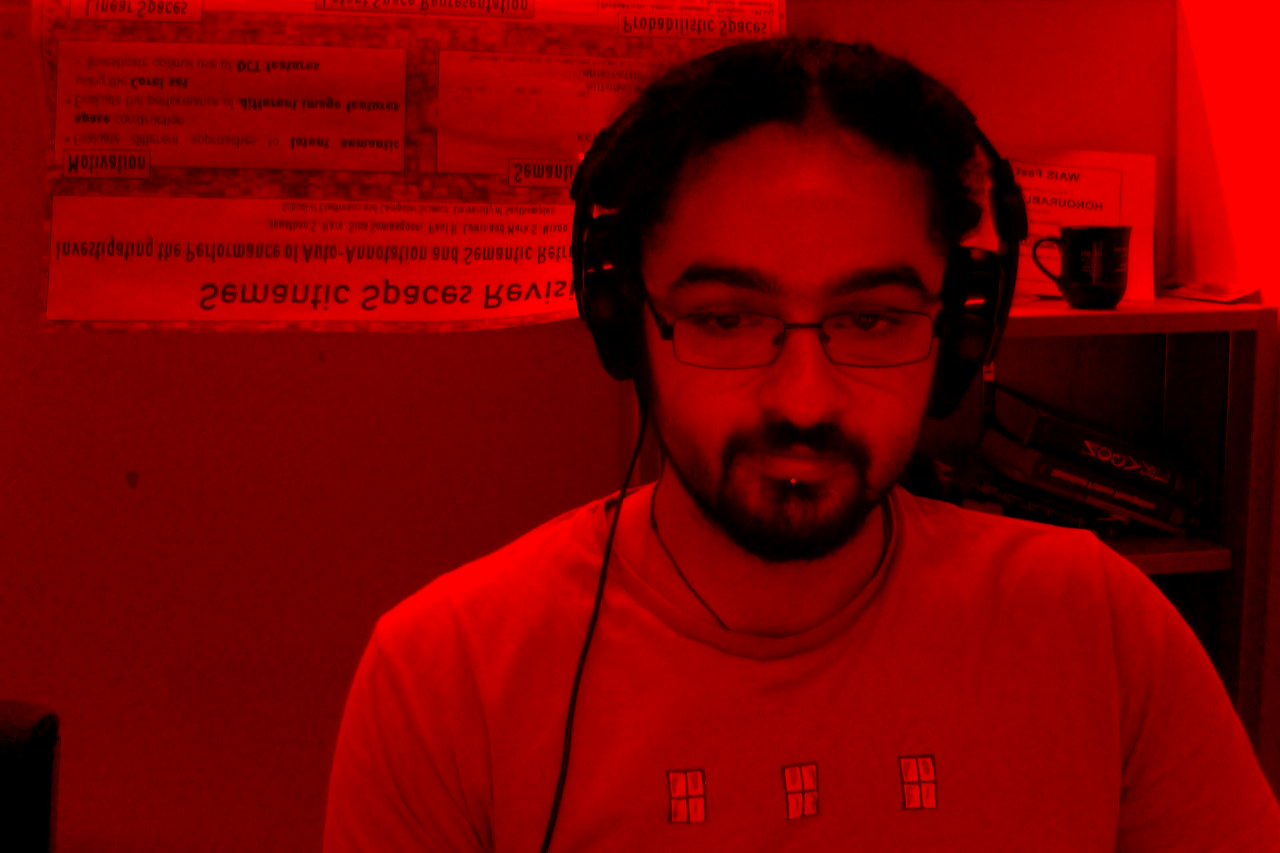
Note that the first thing we do here is to clone
the image to preserve the original image for the remainder of the
tutorial. The pixels in an FImage are held in a
2D float array. The rows of the image are held in the first array
that, in turn, holds each of the column values for that row:
[y][x]. By displaying this image we should see an
image where two channels are black and one channel is not. This
results in an image that looks rather red.
Though it is helpful to sometimes get access to individual image
pixels, OpenIMAJ provides a lot of methods to make things easier.
For example, we could have done the above like this instead:
clone.getBand(1).fill(0f);
clone.getBand(2).fill(0f);
More complex image operations are wrapped up by OpenIMAJ processor
interfaces: ImageProcessors,
KernelProcessors,
PixelProcessors and
GridProcessors. The distinction between these is
how their algorithm works internally. The overarching similarity is
that an image goes in and a processed image (or data) comes out. For
example, a basic operation in image processing is
edge detection. A popular edge
detection algorithm is the Canny edge detector.
We can call the Canny edge detector like so:
image.processInplace(new CannyEdgeDetector());
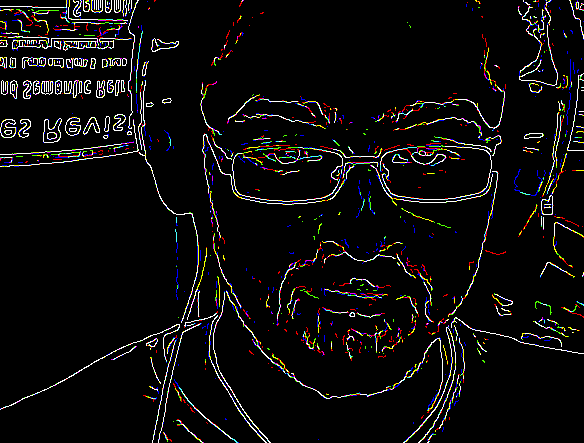
When applied to a colour image, each pixel of each band is replaced
with the edge response at that point (for simplicity you can think
of this as the difference between that pixel and its neighbouring
pixels). If a particular edge is only strong in one band or another
then that colour will be strong, resulting in the psychedelic
colours you should see if you display the image:
DisplayUtilities.display(image);
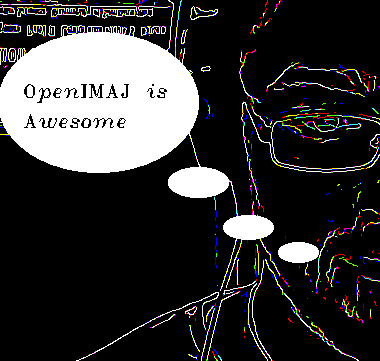
Finally, we can also draw on our image in OpenIMAJ. On every
Image object there is a set of drawing functions
that can be called to draw points, lines, shapes and text on images.
Let’s draw some speech bubbles on our image:
image.drawShapeFilled(new Ellipse(700f, 450f, 20f, 10f, 0f), RGBColour.WHITE);
image.drawShapeFilled(new Ellipse(650f, 425f, 25f, 12f, 0f), RGBColour.WHITE);
image.drawShapeFilled(new Ellipse(600f, 380f, 30f, 15f, 0f), RGBColour.WHITE);
image.drawShapeFilled(new Ellipse(500f, 300f, 100f, 70f, 0f), RGBColour.WHITE);
image.drawText("OpenIMAJ is", 425, 300, HersheyFont.ASTROLOGY, 20, RGBColour.BLACK);
image.drawText("Awesome", 425, 330, HersheyFont.ASTROLOGY, 20, RGBColour.BLACK);
DisplayUtilities.display(image);
Here we construct a series of ellipses (defined by their centre [x,
y], axes [major, minor] and rotation) and draw them as white filled
shapes. Finally, we draw some text on the image and display it.
2.1.1. Exercise 1: DisplayUtilities
Opening lots of windows can waste time and space (for example if
you wanted to view images on every iteration of a process within
a loop). In OpenIMAJ we provide a facility to open a
named display so that was can reuse the
display referring to it by name. Try to do this with all the
images we display in this tutorial. Only 1 window should open
for the whole tutorial.
2.1.2. Exercise 2: Drawing
Those speech bubbles look rather plain; why not give them a nice
border?